How to install our WR25 cooling cellar unit
WR25 Model
You will need the following tools:
-

A pencil
-

A drill
-

A level
-

A screwdriver
-
A hammer
-
A stud finder
-

A ladder


Instructions for installation over a door
-
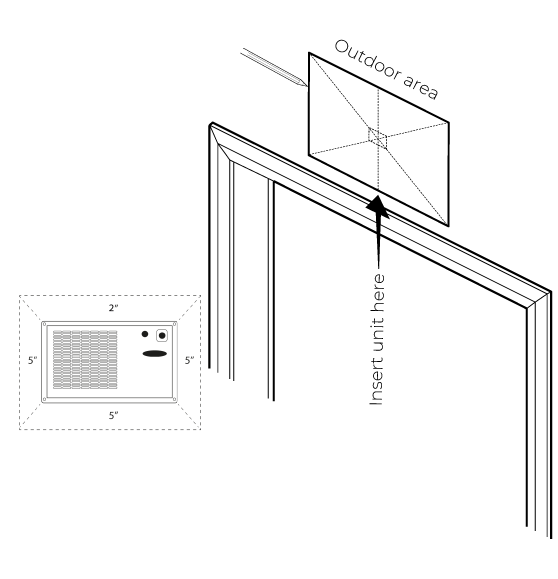
Draw the hole
Use only safe, certified ladders. Trace the outline or draw a pattern above the door to indicate the hot side.
Note: Make sure you have a 5” clearance all around cold side unit.
-
Cut into the wall
Cut out the two sides of the rectangle:
Width: 15⅝″ Height: 9¼″
-
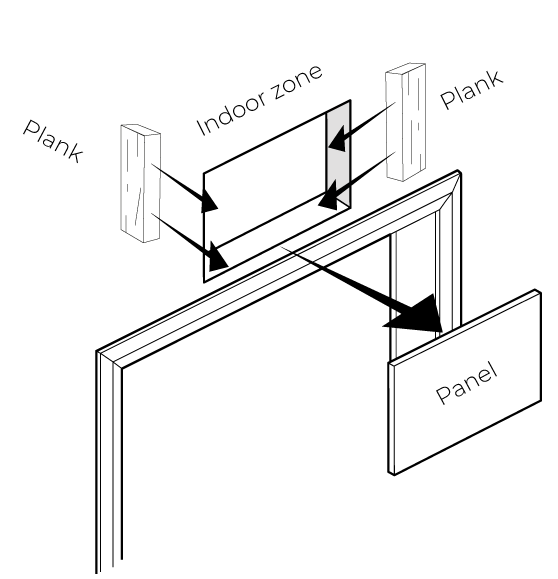
Secure the wall hole
Add 2'' x 4'' planks in order to strengthen the structure.
-
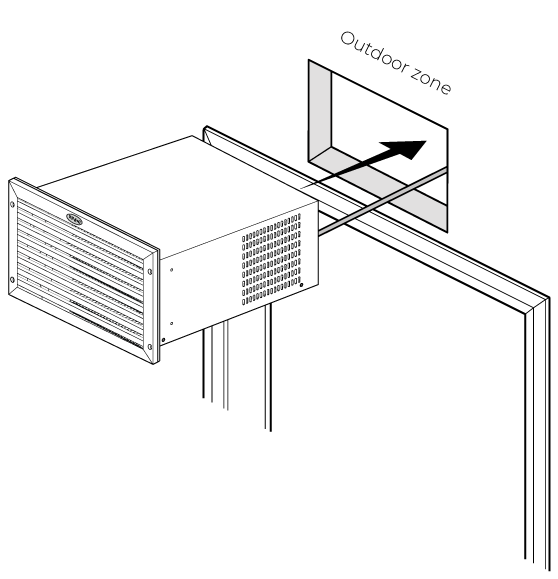
Insert the cooling unit
Carefully insert the cooling unit with the help of another person.
Note: Be careful not to damage the unit when setting it in place.
-
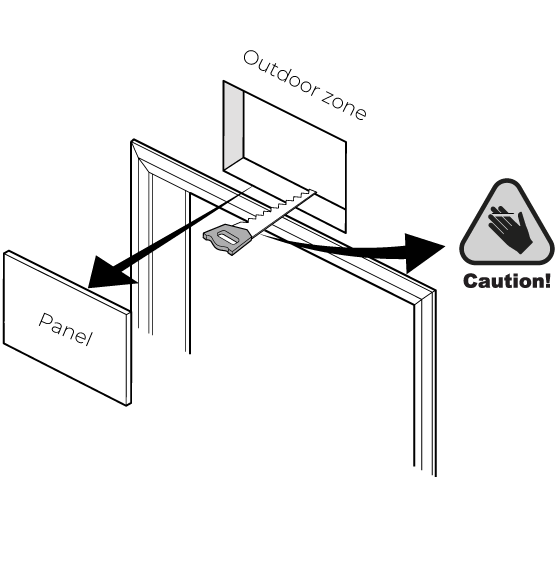
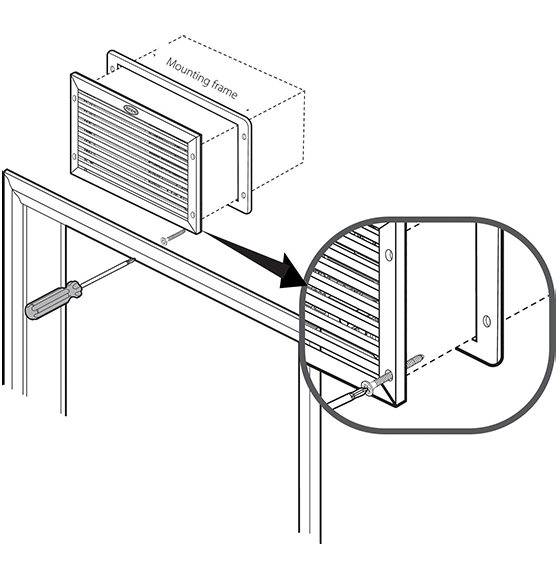
Screw the grille
Add the fixing bracket to the cold side of the unit and attach the grille to the unit with a screwdriver.
-
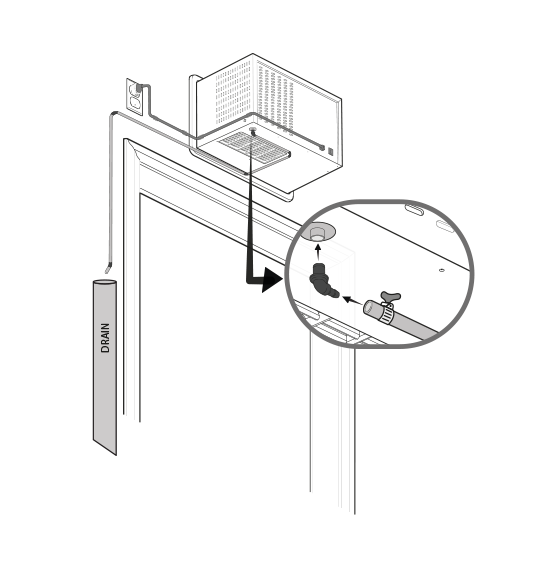
Fixing and plug in
Attach the drain hose or water hose to the elbow, then attach the elbow to the unit. Next, plug the unit into the electrical outlet and wait one minute. The unit will then begin to operate.
*Please note that if you extend the length of the drainage pipe by more than 5 feet, it is imperative to consult a qualified professional to ensure proper drainage function.
-
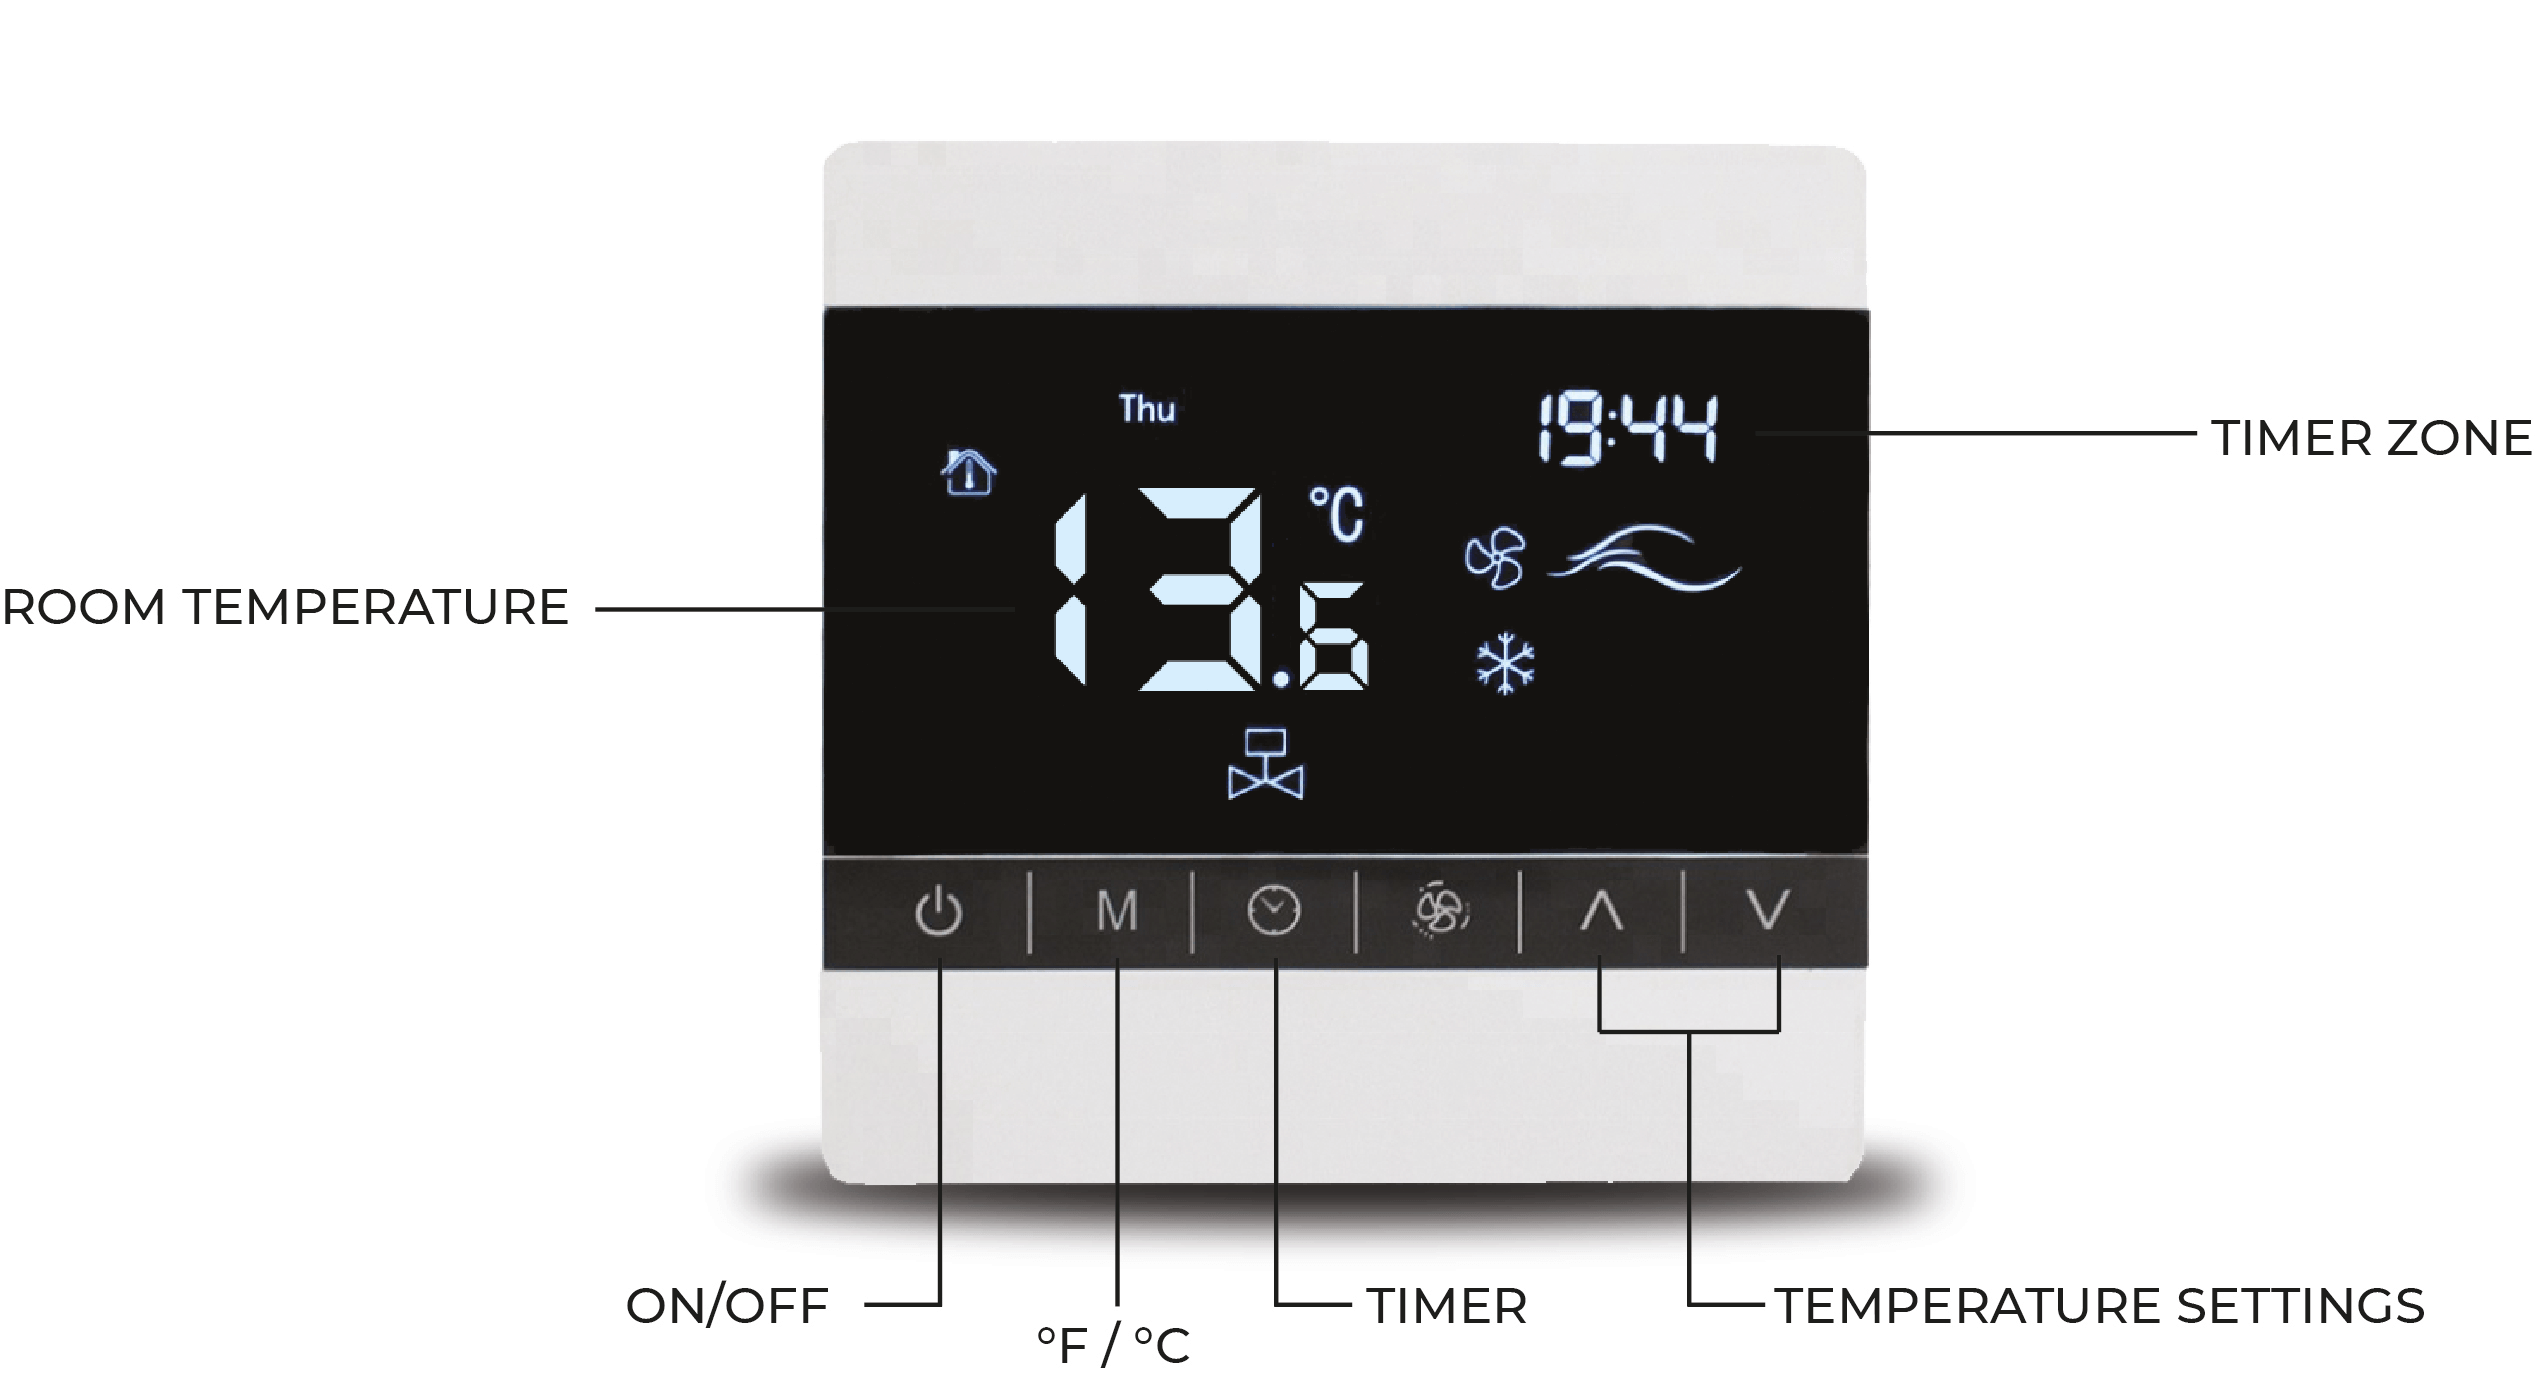
Start up and operating instructions
First, press the POWER button to start the machine.
Note: If the temperature exceeds 22°C, the unit will automatically shut down.


For complete instructions regarding installation, safety and maintenance measures, download the complete user guide.